Sunday, September 15, 2013

Roasted Chicken

Print Friendly and PDF
This is one of my favourite dishes to make when I'm strapped for time with prepping.  I always want a nutritious dinner on the table but sometimes, I don't have a lot of time to spend making an elaborate dinner.  Roasted chicken is quick, simple and delicious.  You can serve it with rice and a cooked vegetable or two, or serve warm chicken with a nice green salad and simple vinaigrette.  At the end of the meal, I separate the leftover meat to use for the next day's lunch or dinner and freeze the carcass.  Once I have three carcasses, I make a delightful chicken broth.  Nothing goes to waste with these little free-range chickens!  Oh, and the chicken tastes amazing infused with these flavours.  I have to draw the line on the amount of skin my youngest son eats, he simply can't get enough!

roasted chicken

6-10 lbs free-range chicken
olive oil
salt
pepper
thyme
3 garlic gloves, peeled and whole

  1. Brush whole chicken with olive oil.
  2. Rub salt, pepper and thyme all over the skin (don't forget the underside).
  3. Sprinke salt, pepper and thyme inside the cavity and add the garlic cloves.
  4. Put chicken on a parchment paper-lined baking sheet.  This makes the clean-up a bit easier.
  5. Bake at 350 degrees for 1 1/2 to 2 hours.  Pierce the chicken with a skewer where the leg meets the body.  If the juices run clear, it's ready.  It's that easy!


I'll take this opportunity to mention that I've stopped following the SCD diet.  If I was a stay-at-home mom, I think I would've been able to go much longer, but gave it a good go for a month and a half.  I've discovered so many new recipes that have become new staples, however, wasn't able to go for the 1-2 years it probably would have taken to get rid of my kids' dairy intolerances.  Thank goodness for the multitude of substitutions available today, the don't really have to go without. And, given that so many people are intolerant to dairy nowadays, it's probably telling of how our bodies just aren't able to 
digest dairy as easily as other products.  I'll still keep on labelling foods that I make that are SCD friendly, in case it can help someone visiting this blog come up with new ideas.

For now, we are back at school and in the full swing of things.  Packing healthy snacks and lunches and keeping it simple!

Wednesday, August 14, 2013

Famous Chicken Fingers / Tenders (Gluten-Free, Paleo, SCD, Wild Rose Herbal D-Tox, Candi)

Print Friendly and PDF
Occasionally, while on a specialized diet, a person only wishes to have "normal" food.  You know what I'm talking about: pizza, a fresh sandwich, moist chocolate cake, and the list goes on... for the most part, it's possible to replicate close to and sometimes, better than,  the original comfort food.  Yes, it comes with more steps than taking it out of the box and baking!  That is just something we can't get away from when trying to eat healthier.  You know that secret ingredient "love"?  Well it comes with loving preparing your own food.  There's no love in taking a chicken nugget out of the box and baking it.  The love comes when I'm chopping my chicken breasts to just the right size, measuring my spices, thinking how I feel so good about putting turmeric in my chicken tenders, knowing my kids will be loving their dinner that is going to nourish their growing bodies and give them the energy they need.  Cheesy?  Maybe, but it makes my world go round.

These are Famous Chicken Fingers.  That's what they're called at my house anyways, and I am proud that they have been so-called!  They disappear in a fraction of the time it took to make them, but I'm one of the four not able to help themselves!

famous chicken fingers / tenders

1 1/2 lbs chicken breast (chopped to chicken finger size)
2 cups almond flour
4 eggs, beaten
3 tablespoons pecorino romano, grated OR 1/3 cup parmesan, grated
2 teaspoons parsley
1 teaspoon garlic powder
1/2 teaspoon black pepper
1/2 teaspoon chili powder
1/2 teaspoon turmeric
1 cup olive oil (or more) for frying


  • Now this step will make it a much smoother process: having a good production line happening.  
  • In medium bowl, beat eggs.  Add chicken pieces to beaten egg and mix well.  Set aside.
  • In another medium bowl, combine the rest of the ingredients.  Mix well and transfer to a dinner plate.
  • Pour at least 1 cup olive oil into your frying pan.  Heat to medium/high.
  • Take out a clean plate where  you will put your coated chicken pieces while waiting for your current batch to cook.


  • While your oil is heating up, coat your first batch of chicken pieces and place in clean plate.
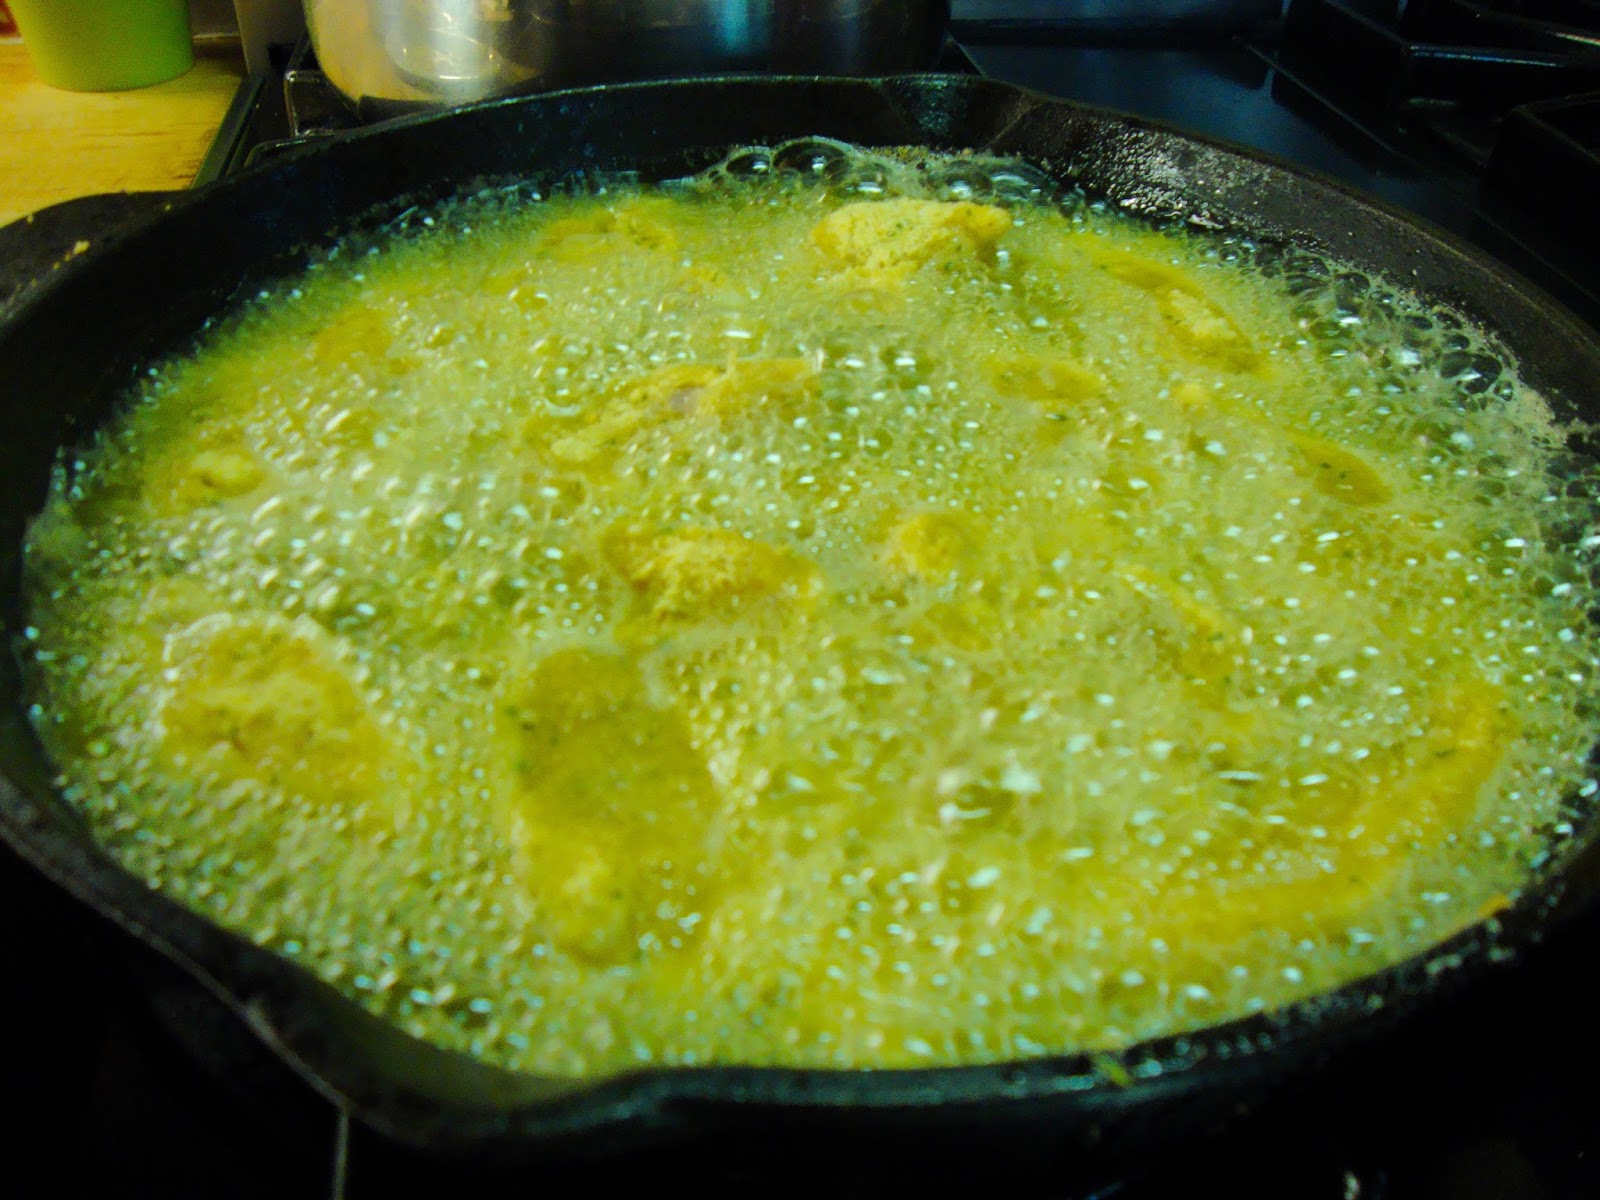
  • When a drop of cold water sizzles in the oil, it's ready.  Gently place chicken pieces in oil, one at a time.  Oil should cover the sides or else the sides will be soggy.

  •  Cook for 3 minutes first side, then turn with tongs and cook for another 2 minutes.  When this batch is cooking, get your next batch of chicken fingers coated and ready to go.
  • Removed cooked chicken fingers and place on paper towel covered cookie sheet.  Place in 150 degree oven to keep warm.
  • Once I remove my cooked chicken fingers, using a slotted spoon, I remove the foam and grits from almond flour that have accumulated.  I add a little more olive oil and repeat the process until they are all cooked.
  • Serve this with a homemade honey-mustard sauce(unless on D-Tox or Candida diet).  Just mix honey and mustard in a bowl and adjust to taste.  
  • Enjoy!!!


Sunday, August 4, 2013

Strawberry Jam (No Pectin, No Sugar) - canning or frozen

Print Friendly and PDF

When I was young, growing up in small town St-Paul, New Brunswick, Canada, U-Picking was a yearly occurrence at our house.  Strawberries was my favourite, one for the bucket, one for me!  We'd spend the morning picking and the afternoon hulling.  My mom would do the rest, freezing strawberries and making jam.  Being a mom now and knowing how whiny kids can be :), we must have complained at times over the work involved, however, looking back now, those are some of my best memories: everyone sitting at the table working together, talking, laughing, oh the nostalgia!

My boys are now 8 and 5 and I wanted to bring them out U-Picking this year.  In Calgary, Alberta where we live, U-Picking farms are slim pickin', pun intended ;)  I found one an hour's drive away so we headed out with my sister and her two kids on opening day and were there first thing.  We were determined to get first dibs on those strawberries and we did!  We even got a private tour of the farm from one of the boys that lives there, what a treat for the kids!  If you don't have any U-Pick farms around, just buy a large box at your farmers market.
My 8 year old son Mathieu, enjoying his first U-Pick
I got home with a good amount of strawberries.  I froze some and wanted to make some jam, however, sugar and store-bought pectin is not an option for our uber-healthy lifestyle.  After searching for ingredients that worked for others, I decided to use grated apples, fresh squeezed lemon juice and honey.  I played with the amounts until it was just right.  The end result is a jam that is better than any I've ever had!  It's thick, sweet and a little tart.  Perfect on a piece of toast (almond bread toast in this household), or mixed in with some plain yogurt for a better-than-store-bought strawberry yogurt.

I'm not going to lie, canning jam is a full day's work, but if you're reading this post and think you might want to try it, DO SO!  It is so worth the effort, knowing you have locally grown fruit to enjoy all winter long.

The recipe indicates that this is pectin-free jam.  I'm referring to store-bought pectin, the stuff you buy in a box.  This contains natural pectin found in apples.

strawberry jam (pectin-free, sugar-free) - canning or frozen

8 lbs strawberries, hulled
3 cups honey
2 cups grated apples, with skin
2 tablespoons lemon juice

  1. Place all ingredients in a large pot and bring to a boil on medium-high heat.
  2. Bring down to a low boil stirring often to prevent scorching.
  3. Once the strawberries are soft, mash with a potato masher.  I found it was difficult to get them well mashed while they were in the large pot, so I heated a large frying pan and in 3 separate batches, put some of my mixture and mashed them in there.  With the pan being shallow, it was much easier to mash.  My kids aren't fans of large chunks of fruit in their jam, so I mashed for quite a while, until my desired consistency.   I'm sure that you could play with this though, and leave some larger chunks if you prefer.
  4. Keep on low boil until the jam gets quite thick.  I boiled it for an hour, stirring very often.
  5. Remove foam from top as it forms.  My youngest son really enjoyed this by dipping some almond bread in the foam.
  6. If you don't want to continue with the canning, let your mixture cool, fill your freezer-safe jars, container or ziplock bags(remove as much air as possible) and freeze for up to one year.
  7. To can in jars, sterilize your jars and lids.  Your jars can be sterilized in the dishwasher on high heat.  To sterilize the rings, add them to a small pot of boiling water and boil for 10 minutes.  Turn off the heat and leave them in the water until ready to use.
  8. Fill your water bath canner so that the water will be at least an inch over your jars.  Bring water to a boil.  
  9. Fill your jars with the jam leaving 1/4 inch space.  
  10. Wipe jars with wet cloth so that they are clean.  This will ensure a good seal with the lids.
  11. Cover with lid and screw the rings with a light touch.  You don't want to screw on the ring tightly at this point.
  12. Carefully drop your jars in the boiling canner. 
  13. Cover canner and let boil for 10 minutes, if at sea level.  Add 1 minute for each 1000 ft above sea level.
  14. Remove jars from water and place on a rack on your counter.  Your lids should start to pop right away, the sign that they have successfully sealed.  Oh that sound is so satisfying after all that work!
  15. Remove the rings.  Wash the rings and wipe the jar again, to prevent mold from forming under your rings.  Screw rings back on, a little tighter this time, but not with force.
  16. Store in a cool, dry place.
Note: If some of your jars don't seal, just place in the fridge and use these first.  

Pressure Canner: I don't have experience with these, so please follow the instructions that come with your pressure canner.
getting happy in the pot

a batch in the frying pan for mashing

Saturday, August 3, 2013

Cream of Tomato and Hamburger Soup (Gluten-free, Paleo, SCD)

Print Friendly and PDF
We love to eat this soup and I especially love to make it.  Most soups that I make are pureed and this one doesn't require cleanup of my blender or food processor...bonus!

cream of tomato soup

1 large can(1.36L) tomato juice(tomato and salt only in ingredients list) 
1 cup yogurt (I use my homemade SCD yogurt, instructions in the book "Breaking the Vicious Cycle")
1 lbs lean ground beef
1 onion
1/4 cup honey
2 tablespoons fresh basil, chopped
pepper to taste

  1. Fry onion and ground beef in a hot skillet until well done.  Set aside.
  2. In a large soup pot, add tomato juice, yogurt and honey.  Whisk until smooth.
  3. Turn heat to medium high, whisking occasionally until thoroughly heated.
  4. Add ground beef mixture and fresh basil and stir.
  5. Add pepper to taste.
  6. Serve and enjoy!
Paleo: Some are ok with having this 24-hour fermented yogurt while following the Paleo diet and some prefer not to have any type of dairy products.  
***I will post the yogurt recipe very soon!


Friday, August 2, 2013

Banana Pancakes (Gluten-Free, SCD, Paleo)

Print Friendly and PDF
Wow it sure has been a long time since I've posted a recipe!  I've been spending more time in the kitchen than ever, finding inspiration in recipes I find from blogs, websites, cookbooks, magazines, etc.  I've been on the search for simple recipes, trying to find new ingredient combinations which tickle our tastebuds, all the while being healthy, wholesome, gluten-free, and on and on!

Now, here's a new kicker, just over three weeks ago, we started the Specific Carbohydrate Diet (SCD).  I had read how so many diseases can be cured with this diet, including but not limited to crohn's, ulcerative colitis, celiac, chronic diarrhea and autism.  No one in our family has any of these, however, digestive issues are prevalent as well as dairy intolerance, another digestive issue.  So I made the leap.  It took me a few weeks of reading, internet searching for other people's experiences, and finally I bought the book "Breaking the Vicious Cycle" by Elaine Gottschall.

I won't go into details about the Specific Carbohydrate Diet on this post.  To learn more about it, visit www.breakingtheviciouscycle.info.

My kids have been eating cereal for breakfast for years.  They were a little panicked when they found out they wouldn't be able to eat cereal anymore!  Well these banana pancakes did the trick and as far as recipes go, it doesn't any simpler than this, with only two ingredients!  We love these for breakfast or as a quick grab-and-go snack.

There are many SCD sites and blogs which have this recipe, calling for 1 banana and 1 egg.  The first time I tried to make them, they didn't turn out.  Maybe my bananas were too big? So I came up with a ratio that delivers great results every time.

banana pancakes

1 cup bananas (ripe, spotted  bananas)
3 eggs

  1. Put all ingredients in the blender.
  2. Mix until well blended.
  3. Pour into well oiled pan on medium heat (I use coconut oil).
  4. Cook for about 2 minutes, until the bottom is golden
  5. Flip and cook the other side for another couple minutes.
***I triple this recipe and it doesn't last more than a day.  These are sweet enough to eat on their own.  My kids like it with a drizzle of our "syrup", which is honey, heated with a bit of water and butter.

***This is also great recipe to make when slowly reintroducing foods after finishing the Wild Rose Herbal D-Tox.


Sunday, May 19, 2013

Power Bars

Print Friendly and PDF

These are a great treat when I need a sweet treat without the guilt.  Dates do have a lot of natural sugars so these bars are not to be eaten in large amounts.  One square curbs my craving for sweets immediately.
Similar bars can be found in health food stores, however, they are so expensive!  A little bit of work in the kitchen makes a big difference on the grocery bill.

power bars

30 medijool dates, pitted
1 cup pecans
1/2 cup dry roasted almonds
1/2 cup unsweetened coconut
4 tablespoons coconut powder
2 tablespoons almond butter


  1. Place all ingredients in food processor.
  2. Blend for a 2-3 minutes, until you can form a ball with a spoonful.
  3. Pour mixture into a parchment paper lined 9 X 13 cookie sheet or casserole dish.
  4. Press down on mixture until it's very compacted.  This process should take a few minutes.
  5. Cover with a cloth and refrigerate for 4-5 hours.
  6. Remove from cookie sheet/casserole dish by pulling on the parchment paper.
  7. Place on a cutting board (with parchment paper still underneath the mixture) and cut into desired size squares/bars.
  8. Wrap individually in plastic wrap, place in a sealed container and return to refrigerator.  
  9. These are great to enjoy as a quick snack at home or grab one to go!


Monday, April 1, 2013

Butternut Squash Soup

Print Friendly and PDF
When I think butternut squash soup, I think velvety, comforting, flavourful and simple.  This soup is all of the above.  If you like butternut squash, you will absolutely love this soup.  I don't have a picture of the finished product but it should be a nice soft, velvety texture. 

butternut squash soup
1 butternut squash, halved and seeded
3 vine tomatoes
1 large red onion, peeled and halved
2 garlic bulbs, tops sliced off
olive oil
dried thyme 
4 cups chicken stock
salt and pepper
  1. Preheat oven to 425 degrees.
  2. Lightly oil a baking sheet.
  3. Place all vegetables on baking sheet as shown in picture below.

    3.  Brush butternut squash and onions with olive oil.
    4.  Drizzle olive oil on top of garlic bulbs.
    5.  Sprinkle a good amount of dried thyme on top of the butternut squash, onion and garlic.  Leave 
         the tomatoes as they are.
    6.  Bake until butternut squash is soft.  The timing is tricky to predict as butternut squash comes in so 
         many different sizes.  Check after 30 minutes: if other veggies are ready but squash is not, remove 
         the ones that are ready and return squash.  
    7.  In a large pot, put the following:
  • chicken stock
  • garlic: grab the whole garlic bulb and squeeze out roasted garlic (cutting the tops off initially makes squeezing out the softened garlic a breeze!)
  • tomatoes: chop off the coarse top that attaches to the vine.
  • onion: remove outer skin layer if it has become blackened or tough.  You want only the softened onion skins.
  • butternut squash: with a spoon, scoop out all the softened squash meat.
    8.  Bring all ingredients to a simmer and mash roughly with a potato masher. 
    9.  If you have a good immersion blender, now's the time to let it work its magic.  If not, puree in 
         batches in your food processor or blender.
  10.  Return all to blender, heat and add salt and pepper to taste.  (This soup freezes very well!)