Showing posts with label paleo diet. Show all posts

Thursday, October 17, 2013

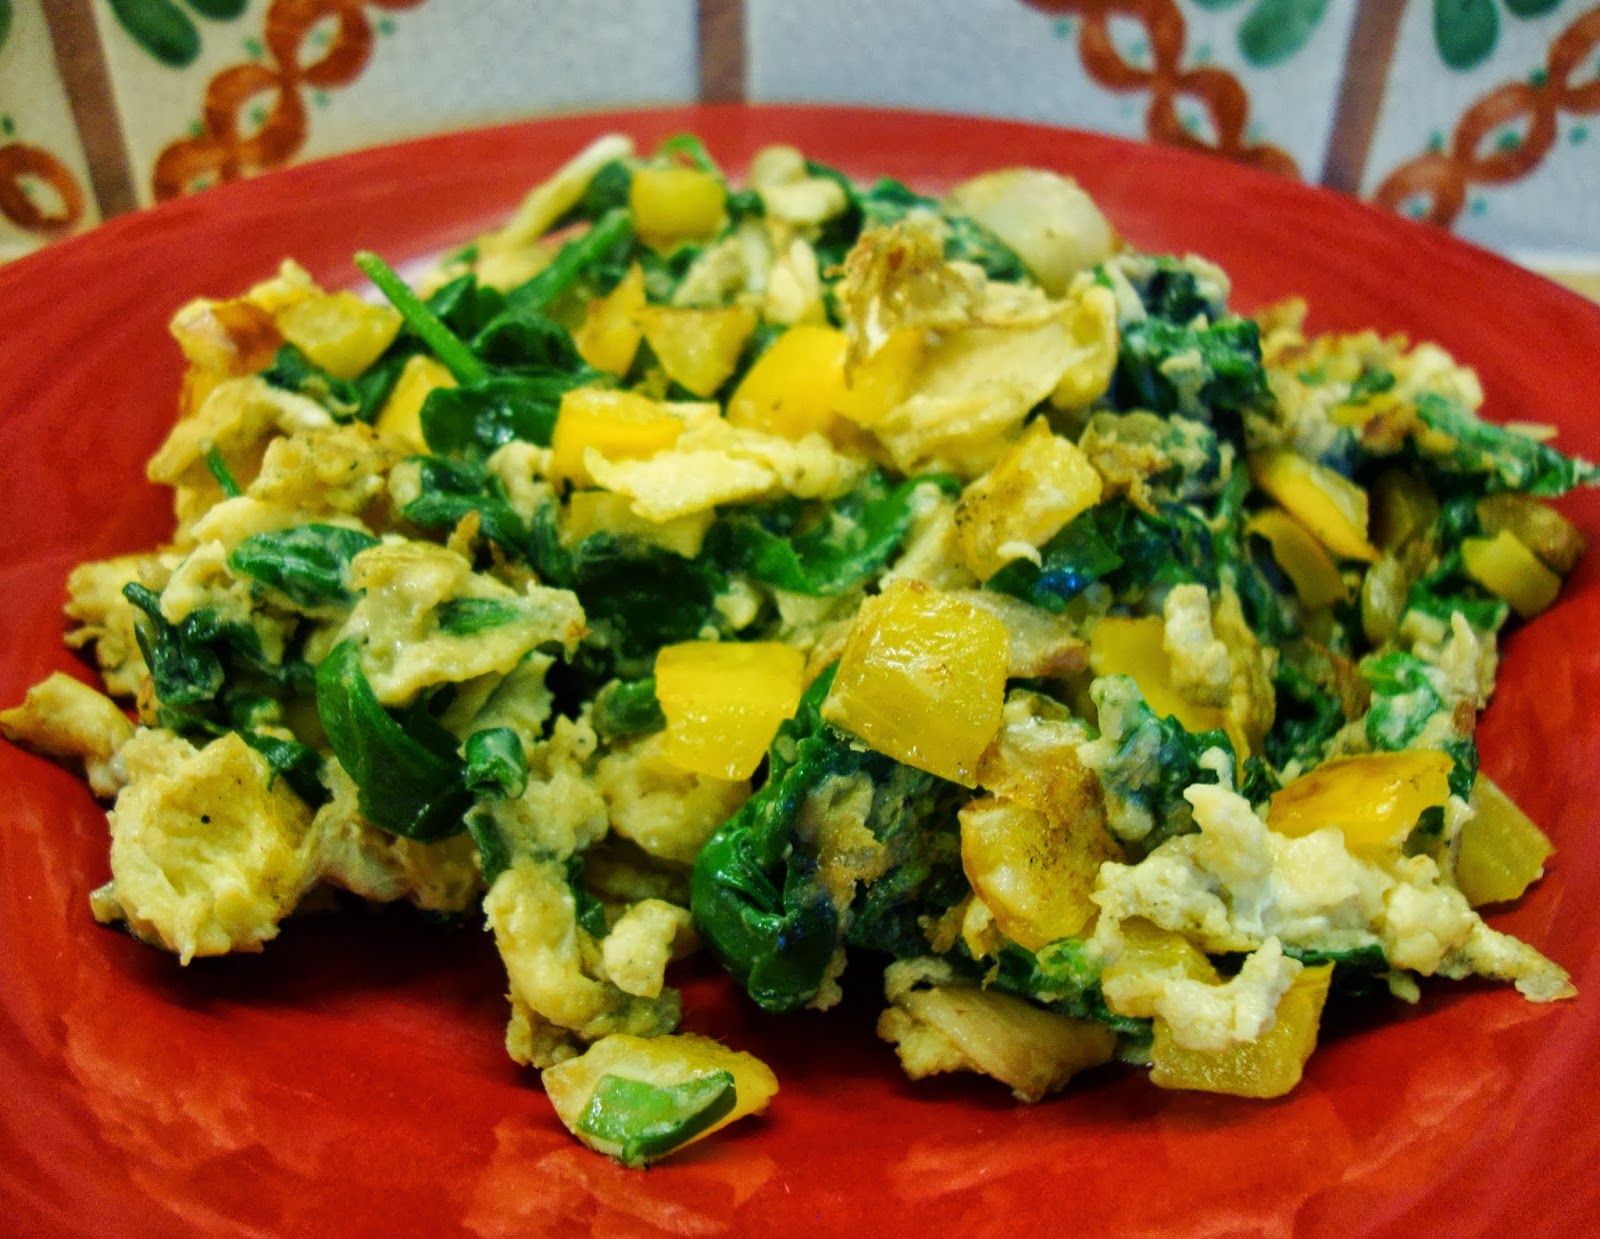
Green Egg Scramble

Print Friendly and PDF


Wild Rose Herbal D-Tox day #1... This breakfast came together so quickly, having a warm, delicious breakfast is only a few minutes away.

Soya sauce and eggs - a flavour combination I've loved since my mom first made it many moons ago.  If you haven't tried this yet, you will be pleasantly surprised.

During the twelve days of detoxing, some days are tougher than others.  What I find works for me is keeping it simple but also delicious.  If my food is boring, I won't stick with it, but I also don't want to spend all my time slaving away for each meal.  The good news is, it doesn't always have to be a planned recipe.  Combine ingredients you already have in stock.   Any veggies you have will work in this recipe: peppers, zucchini, onions...  The trick up my sleeve on this one is the Bragg's liquid soy seasoning, which gives eggs a new twist!  (Bragg's tastes very similar to soya sauce, but unlike soya sauce, it is allowed on the D-Tox)

green egg scramble

1 tablespoon unsalted butter
1/2 yellow pepper, chopped
2 garlic cloves, sliced thinly
2 large handfuls chopped spinach
2 eggs, beaten
Bragg's soy seasoning

  1. Heat frying pan to medium.
  2. Melt butter and fry pepper for about 3 minutes.
  3. Add garlic and cook for another couple minutes, until the garlic just starts to get some colour.
  4. Add spinach and cook until wilted, stirring often.
  5. Add eggs and a good squirt of Bragg's.  
  6. Stir until eggs are cooked through.
  7. Enjoy!


Sunday, September 15, 2013

Roasted Chicken

Print Friendly and PDF
This is one of my favourite dishes to make when I'm strapped for time with prepping.  I always want a nutritious dinner on the table but sometimes, I don't have a lot of time to spend making an elaborate dinner.  Roasted chicken is quick, simple and delicious.  You can serve it with rice and a cooked vegetable or two, or serve warm chicken with a nice green salad and simple vinaigrette.  At the end of the meal, I separate the leftover meat to use for the next day's lunch or dinner and freeze the carcass.  Once I have three carcasses, I make a delightful chicken broth.  Nothing goes to waste with these little free-range chickens!  Oh, and the chicken tastes amazing infused with these flavours.  I have to draw the line on the amount of skin my youngest son eats, he simply can't get enough!

roasted chicken

6-10 lbs free-range chicken
olive oil
salt
pepper
thyme
3 garlic gloves, peeled and whole

  1. Brush whole chicken with olive oil.
  2. Rub salt, pepper and thyme all over the skin (don't forget the underside).
  3. Sprinke salt, pepper and thyme inside the cavity and add the garlic cloves.
  4. Put chicken on a parchment paper-lined baking sheet.  This makes the clean-up a bit easier.
  5. Bake at 350 degrees for 1 1/2 to 2 hours.  Pierce the chicken with a skewer where the leg meets the body.  If the juices run clear, it's ready.  It's that easy!


I'll take this opportunity to mention that I've stopped following the SCD diet.  If I was a stay-at-home mom, I think I would've been able to go much longer, but gave it a good go for a month and a half.  I've discovered so many new recipes that have become new staples, however, wasn't able to go for the 1-2 years it probably would have taken to get rid of my kids' dairy intolerances.  Thank goodness for the multitude of substitutions available today, the don't really have to go without. And, given that so many people are intolerant to dairy nowadays, it's probably telling of how our bodies just aren't able to 
digest dairy as easily as other products.  I'll still keep on labelling foods that I make that are SCD friendly, in case it can help someone visiting this blog come up with new ideas.

For now, we are back at school and in the full swing of things.  Packing healthy snacks and lunches and keeping it simple!

Wednesday, August 14, 2013

Famous Chicken Fingers / Tenders (Gluten-Free, Paleo, SCD, Wild Rose Herbal D-Tox, Candi)

Print Friendly and PDF
Occasionally, while on a specialized diet, a person only wishes to have "normal" food.  You know what I'm talking about: pizza, a fresh sandwich, moist chocolate cake, and the list goes on... for the most part, it's possible to replicate close to and sometimes, better than,  the original comfort food.  Yes, it comes with more steps than taking it out of the box and baking!  That is just something we can't get away from when trying to eat healthier.  You know that secret ingredient "love"?  Well it comes with loving preparing your own food.  There's no love in taking a chicken nugget out of the box and baking it.  The love comes when I'm chopping my chicken breasts to just the right size, measuring my spices, thinking how I feel so good about putting turmeric in my chicken tenders, knowing my kids will be loving their dinner that is going to nourish their growing bodies and give them the energy they need.  Cheesy?  Maybe, but it makes my world go round.

These are Famous Chicken Fingers.  That's what they're called at my house anyways, and I am proud that they have been so-called!  They disappear in a fraction of the time it took to make them, but I'm one of the four not able to help themselves!

famous chicken fingers / tenders

1 1/2 lbs chicken breast (chopped to chicken finger size)
2 cups almond flour
4 eggs, beaten
3 tablespoons pecorino romano, grated OR 1/3 cup parmesan, grated
2 teaspoons parsley
1 teaspoon garlic powder
1/2 teaspoon black pepper
1/2 teaspoon chili powder
1/2 teaspoon turmeric
1 cup olive oil (or more) for frying


  • Now this step will make it a much smoother process: having a good production line happening.  
  • In medium bowl, beat eggs.  Add chicken pieces to beaten egg and mix well.  Set aside.
  • In another medium bowl, combine the rest of the ingredients.  Mix well and transfer to a dinner plate.
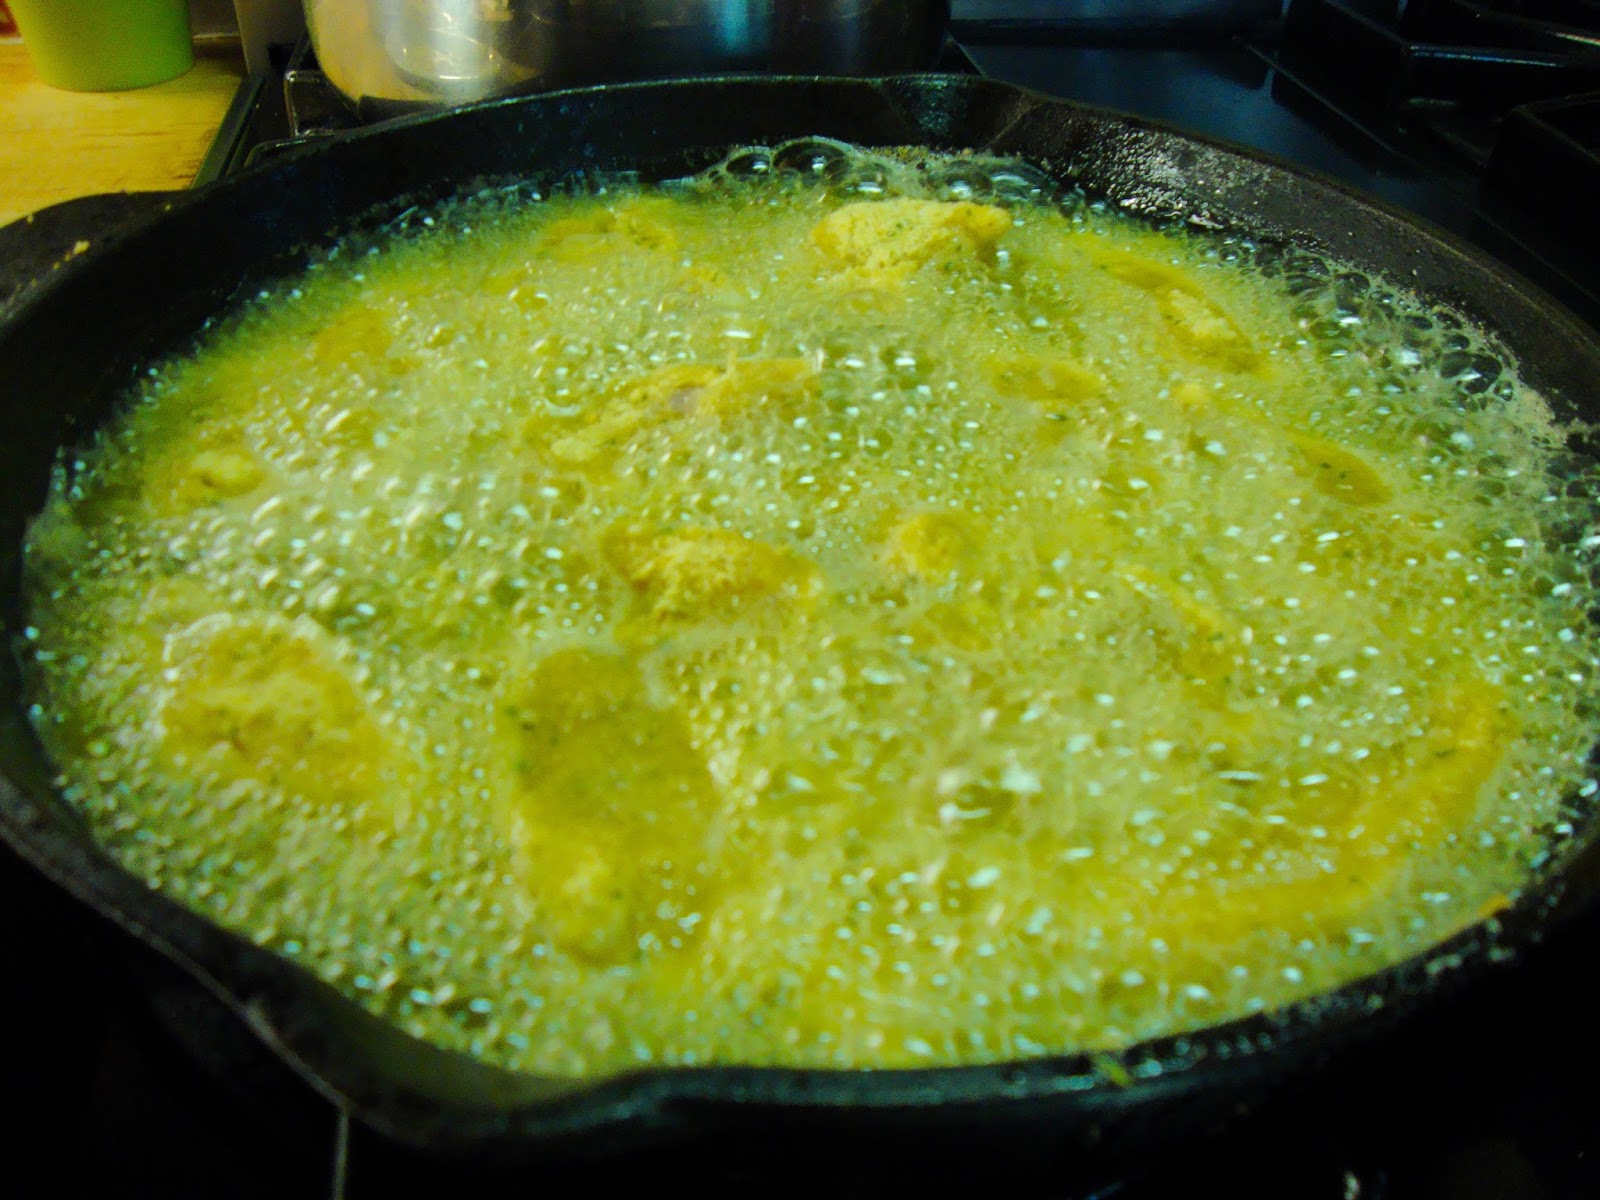
  • Pour at least 1 cup olive oil into your frying pan.  Heat to medium/high.
  • Take out a clean plate where  you will put your coated chicken pieces while waiting for your current batch to cook.


  • While your oil is heating up, coat your first batch of chicken pieces and place in clean plate.
  • When a drop of cold water sizzles in the oil, it's ready.  Gently place chicken pieces in oil, one at a time.  Oil should cover the sides or else the sides will be soggy.

  •  Cook for 3 minutes first side, then turn with tongs and cook for another 2 minutes.  When this batch is cooking, get your next batch of chicken fingers coated and ready to go.
  • Removed cooked chicken fingers and place on paper towel covered cookie sheet.  Place in 150 degree oven to keep warm.
  • Once I remove my cooked chicken fingers, using a slotted spoon, I remove the foam and grits from almond flour that have accumulated.  I add a little more olive oil and repeat the process until they are all cooked.
  • Serve this with a homemade honey-mustard sauce(unless on D-Tox or Candida diet).  Just mix honey and mustard in a bowl and adjust to taste.  
  • Enjoy!!!


Sunday, August 4, 2013

Strawberry Jam (No Pectin, No Sugar) - canning or frozen

Print Friendly and PDF

When I was young, growing up in small town St-Paul, New Brunswick, Canada, U-Picking was a yearly occurrence at our house.  Strawberries was my favourite, one for the bucket, one for me!  We'd spend the morning picking and the afternoon hulling.  My mom would do the rest, freezing strawberries and making jam.  Being a mom now and knowing how whiny kids can be :), we must have complained at times over the work involved, however, looking back now, those are some of my best memories: everyone sitting at the table working together, talking, laughing, oh the nostalgia!

My boys are now 8 and 5 and I wanted to bring them out U-Picking this year.  In Calgary, Alberta where we live, U-Picking farms are slim pickin', pun intended ;)  I found one an hour's drive away so we headed out with my sister and her two kids on opening day and were there first thing.  We were determined to get first dibs on those strawberries and we did!  We even got a private tour of the farm from one of the boys that lives there, what a treat for the kids!  If you don't have any U-Pick farms around, just buy a large box at your farmers market.
My 8 year old son Mathieu, enjoying his first U-Pick
I got home with a good amount of strawberries.  I froze some and wanted to make some jam, however, sugar and store-bought pectin is not an option for our uber-healthy lifestyle.  After searching for ingredients that worked for others, I decided to use grated apples, fresh squeezed lemon juice and honey.  I played with the amounts until it was just right.  The end result is a jam that is better than any I've ever had!  It's thick, sweet and a little tart.  Perfect on a piece of toast (almond bread toast in this household), or mixed in with some plain yogurt for a better-than-store-bought strawberry yogurt.

I'm not going to lie, canning jam is a full day's work, but if you're reading this post and think you might want to try it, DO SO!  It is so worth the effort, knowing you have locally grown fruit to enjoy all winter long.

The recipe indicates that this is pectin-free jam.  I'm referring to store-bought pectin, the stuff you buy in a box.  This contains natural pectin found in apples.

strawberry jam (pectin-free, sugar-free) - canning or frozen

8 lbs strawberries, hulled
3 cups honey
2 cups grated apples, with skin
2 tablespoons lemon juice

  1. Place all ingredients in a large pot and bring to a boil on medium-high heat.
  2. Bring down to a low boil stirring often to prevent scorching.
  3. Once the strawberries are soft, mash with a potato masher.  I found it was difficult to get them well mashed while they were in the large pot, so I heated a large frying pan and in 3 separate batches, put some of my mixture and mashed them in there.  With the pan being shallow, it was much easier to mash.  My kids aren't fans of large chunks of fruit in their jam, so I mashed for quite a while, until my desired consistency.   I'm sure that you could play with this though, and leave some larger chunks if you prefer.
  4. Keep on low boil until the jam gets quite thick.  I boiled it for an hour, stirring very often.
  5. Remove foam from top as it forms.  My youngest son really enjoyed this by dipping some almond bread in the foam.
  6. If you don't want to continue with the canning, let your mixture cool, fill your freezer-safe jars, container or ziplock bags(remove as much air as possible) and freeze for up to one year.
  7. To can in jars, sterilize your jars and lids.  Your jars can be sterilized in the dishwasher on high heat.  To sterilize the rings, add them to a small pot of boiling water and boil for 10 minutes.  Turn off the heat and leave them in the water until ready to use.
  8. Fill your water bath canner so that the water will be at least an inch over your jars.  Bring water to a boil.  
  9. Fill your jars with the jam leaving 1/4 inch space.  
  10. Wipe jars with wet cloth so that they are clean.  This will ensure a good seal with the lids.
  11. Cover with lid and screw the rings with a light touch.  You don't want to screw on the ring tightly at this point.
  12. Carefully drop your jars in the boiling canner. 
  13. Cover canner and let boil for 10 minutes, if at sea level.  Add 1 minute for each 1000 ft above sea level.
  14. Remove jars from water and place on a rack on your counter.  Your lids should start to pop right away, the sign that they have successfully sealed.  Oh that sound is so satisfying after all that work!
  15. Remove the rings.  Wash the rings and wipe the jar again, to prevent mold from forming under your rings.  Screw rings back on, a little tighter this time, but not with force.
  16. Store in a cool, dry place.
Note: If some of your jars don't seal, just place in the fridge and use these first.  

Pressure Canner: I don't have experience with these, so please follow the instructions that come with your pressure canner.
getting happy in the pot

a batch in the frying pan for mashing

Saturday, August 3, 2013

Cream of Tomato and Hamburger Soup (Gluten-free, Paleo, SCD)

Print Friendly and PDF
We love to eat this soup and I especially love to make it.  Most soups that I make are pureed and this one doesn't require cleanup of my blender or food processor...bonus!

cream of tomato soup

1 large can(1.36L) tomato juice(tomato and salt only in ingredients list) 
1 cup yogurt (I use my homemade SCD yogurt, instructions in the book "Breaking the Vicious Cycle")
1 lbs lean ground beef
1 onion
1/4 cup honey
2 tablespoons fresh basil, chopped
pepper to taste

  1. Fry onion and ground beef in a hot skillet until well done.  Set aside.
  2. In a large soup pot, add tomato juice, yogurt and honey.  Whisk until smooth.
  3. Turn heat to medium high, whisking occasionally until thoroughly heated.
  4. Add ground beef mixture and fresh basil and stir.
  5. Add pepper to taste.
  6. Serve and enjoy!
Paleo: Some are ok with having this 24-hour fermented yogurt while following the Paleo diet and some prefer not to have any type of dairy products.  
***I will post the yogurt recipe very soon!


Friday, August 2, 2013

Banana Pancakes (Gluten-Free, SCD, Paleo)

Print Friendly and PDF
Wow it sure has been a long time since I've posted a recipe!  I've been spending more time in the kitchen than ever, finding inspiration in recipes I find from blogs, websites, cookbooks, magazines, etc.  I've been on the search for simple recipes, trying to find new ingredient combinations which tickle our tastebuds, all the while being healthy, wholesome, gluten-free, and on and on!

Now, here's a new kicker, just over three weeks ago, we started the Specific Carbohydrate Diet (SCD).  I had read how so many diseases can be cured with this diet, including but not limited to crohn's, ulcerative colitis, celiac, chronic diarrhea and autism.  No one in our family has any of these, however, digestive issues are prevalent as well as dairy intolerance, another digestive issue.  So I made the leap.  It took me a few weeks of reading, internet searching for other people's experiences, and finally I bought the book "Breaking the Vicious Cycle" by Elaine Gottschall.

I won't go into details about the Specific Carbohydrate Diet on this post.  To learn more about it, visit www.breakingtheviciouscycle.info.

My kids have been eating cereal for breakfast for years.  They were a little panicked when they found out they wouldn't be able to eat cereal anymore!  Well these banana pancakes did the trick and as far as recipes go, it doesn't any simpler than this, with only two ingredients!  We love these for breakfast or as a quick grab-and-go snack.

There are many SCD sites and blogs which have this recipe, calling for 1 banana and 1 egg.  The first time I tried to make them, they didn't turn out.  Maybe my bananas were too big? So I came up with a ratio that delivers great results every time.

banana pancakes

1 cup bananas (ripe, spotted  bananas)
3 eggs

  1. Put all ingredients in the blender.
  2. Mix until well blended.
  3. Pour into well oiled pan on medium heat (I use coconut oil).
  4. Cook for about 2 minutes, until the bottom is golden
  5. Flip and cook the other side for another couple minutes.
***I triple this recipe and it doesn't last more than a day.  These are sweet enough to eat on their own.  My kids like it with a drizzle of our "syrup", which is honey, heated with a bit of water and butter.

***This is also great recipe to make when slowly reintroducing foods after finishing the Wild Rose Herbal D-Tox.


Sunday, May 19, 2013

Power Bars

Print Friendly and PDF

These are a great treat when I need a sweet treat without the guilt.  Dates do have a lot of natural sugars so these bars are not to be eaten in large amounts.  One square curbs my craving for sweets immediately.
Similar bars can be found in health food stores, however, they are so expensive!  A little bit of work in the kitchen makes a big difference on the grocery bill.

power bars

30 medijool dates, pitted
1 cup pecans
1/2 cup dry roasted almonds
1/2 cup unsweetened coconut
4 tablespoons coconut powder
2 tablespoons almond butter


  1. Place all ingredients in food processor.
  2. Blend for a 2-3 minutes, until you can form a ball with a spoonful.
  3. Pour mixture into a parchment paper lined 9 X 13 cookie sheet or casserole dish.
  4. Press down on mixture until it's very compacted.  This process should take a few minutes.
  5. Cover with a cloth and refrigerate for 4-5 hours.
  6. Remove from cookie sheet/casserole dish by pulling on the parchment paper.
  7. Place on a cutting board (with parchment paper still underneath the mixture) and cut into desired size squares/bars.
  8. Wrap individually in plastic wrap, place in a sealed container and return to refrigerator.  
  9. These are great to enjoy as a quick snack at home or grab one to go!


Monday, April 1, 2013

Butternut Squash Soup

Print Friendly and PDF
When I think butternut squash soup, I think velvety, comforting, flavourful and simple.  This soup is all of the above.  If you like butternut squash, you will absolutely love this soup.  I don't have a picture of the finished product but it should be a nice soft, velvety texture. 

butternut squash soup
1 butternut squash, halved and seeded
3 vine tomatoes
1 large red onion, peeled and halved
2 garlic bulbs, tops sliced off
olive oil
dried thyme 
4 cups chicken stock
salt and pepper
  1. Preheat oven to 425 degrees.
  2. Lightly oil a baking sheet.
  3. Place all vegetables on baking sheet as shown in picture below.

    3.  Brush butternut squash and onions with olive oil.
    4.  Drizzle olive oil on top of garlic bulbs.
    5.  Sprinkle a good amount of dried thyme on top of the butternut squash, onion and garlic.  Leave 
         the tomatoes as they are.
    6.  Bake until butternut squash is soft.  The timing is tricky to predict as butternut squash comes in so 
         many different sizes.  Check after 30 minutes: if other veggies are ready but squash is not, remove 
         the ones that are ready and return squash.  
    7.  In a large pot, put the following:
  • chicken stock
  • garlic: grab the whole garlic bulb and squeeze out roasted garlic (cutting the tops off initially makes squeezing out the softened garlic a breeze!)
  • tomatoes: chop off the coarse top that attaches to the vine.
  • onion: remove outer skin layer if it has become blackened or tough.  You want only the softened onion skins.
  • butternut squash: with a spoon, scoop out all the softened squash meat.
    8.  Bring all ingredients to a simmer and mash roughly with a potato masher. 
    9.  If you have a good immersion blender, now's the time to let it work its magic.  If not, puree in 
         batches in your food processor or blender.
  10.  Return all to blender, heat and add salt and pepper to taste.  (This soup freezes very well!)


Friday, February 1, 2013

My Go-To Salsa and Guacamole

Print Friendly and PDF


I've posted a recipe of each before, however, this salsa and guacamole are the recipes that I make very regularly.  They are perfect food for serving when entertaining or bring along when going to watch the game at a friend's house.   It's also great to have this in the fridge for your daily chips and dip snacks!

These can also be integrated in other recipes: one of my favourites, a bowl of brown rice with black beans, topped with this fresh salsa.  I love a brown rice cake topped with salsa and guacamole!  Perfect for candida cleanse and Wild Rose Herbal D-Tox.  For Paleo, use these as the toppings for your lettuce wrap tacos and fajitas!

fresh salsa
3 cups roma tomatoes, chopped
1 red pepper, chopped
1/2 red onion, chopped
jalapeño peppers, chopped
large handful cilantro, chopped
1/4 cup apple cider vinegar
juice of 1 lime
salt to taste

  • Put all ingredients except salt in a food processor and pulse until everything comes together to your preferred consistency.  Pour in a medium bowl and add salt to taste.


fresh guacamole
3 soft avocados
1 roma tomato, chopped
1 garlic clove, minced
1/2 cup red onion, chopped finely
small handful cilantro, chopped
juice of 1/2 lime
salt and pepper to taste

  1. In a medium bowl, mash avocados with potato masher.
  2. Add tomato and garlic and mash so tomatoes get crushed.
  3. Add red onion, cilantro and lime juice, mix well.
  4. Add salt and pepper to taste.


Monday, December 17, 2012

Celery Storage

Print Friendly and PDF

Well the Christmas tree is up, the outside lights are on, shopping almost done, and  I haven't been cooking up anything fancy these past couple of weeks.  I've been eating lots of salads, fruit and smoothies.  Keeping it simple during this busy time of year.

Celery has always been one of these vegetables that I put in the drawer, used whatever I needed for a certain recipe, and the rest would go soft so quick.  I knew about this trick, but never really bothered with it.  Now that I buy organic veggies, I'm more attached to the coins that I've spent if we don't eat it, so no more of that!  If the celery is washed, cut and ready to eat, I don't end up throwing any out.  So easy to put on our plates as a side with some baby carrots, and I always pack some for my snack at work.

  1. Wash celeri.
  2. Cut into preferred serving size
  3. Place in container and cover with cold water
  4. Put in fridge and it they will keep well over a week and remain nice and crunchy!

Wednesday, December 5, 2012

Chocolate Chip Cookies

Print Friendly and PDF 
Chocolate chip cookies made with almond flour


I've been making these cookies for a at least a couiple of years now, and the feedback from tasters is always very positive.  Most times, I hear that these are the best chocolate chip cookies they've ever had.  I have to agree.  When I make a batch of these gluten-free chocolate chip cookies, I usually put half of the baked cookies in the freezer and half in the refrigerator.  They freeze really well.

I've tried to make them with a few different almond flours and have to say that not all almond flours are created equal.  For baking, I use JK Gourmet almond flour, which I order on-line.  I use enough of it to buy in bulk and it is much more cost effective and is delivered to my front door!  I've tried Bob's Red Mill Almond Flour and ended up with a flat cookie pie, although it was still delicious!

As usual, this is quite a large batch as this is how I do my cooking, love love love to make enough to freeze!  If trying almond flour for the first time, you're probably not going to buy a large amount.  You can find it at health food stores, although it can be quite pricey for smaller amounts.  If needed, just cut the recipe in 1/2 or 1/3.


chocolate chip cookies

5 cups blanched almond flour (at room temperature)
1/2 teaspoon salt
1/2 teaspoon baking soda
1 cup dark chocolate chips
3/4 cup grapeseed oil
3/4 cup agave or raw honey
1 tablespoon vanilla
1 egg

  1. With metal whisk, mix all dry ingredients in a large bowl.
  2. With metal whisk, mix wet ingredients in smaller bowl.
  3. Mix wet ingredients into the dry with wooden spoon.
  4. Form 1 inch balls and press down on parchment paper-lined baking sheet (kids are a great help with this part!)
  5. Bake at 350 degrees for  13 minutes, or until golden
  6. Remove from oven, let sit in baking sheet for 5 minutes
  7. Place cookies on rack to cool completely.
Vegan: These cookies can easily be made vegan by omiting the egg.  The cookies will still have a nice texture and will not crumble.

Tuesday, December 4, 2012

Cranberry Sauce

Print Friendly and PDF 
Sugar-Free Cranberry Sauce


Oh how I love the holidays!  Spending time with the people we love, and most certainly surrounded by delicious food! 

For people with dietary restrictions, the holidays can sometimes be a little daunting because we are around so much food and in general, they're not the types of foods that people like us eat.  I have found it much easier year after year to simply bypass the flour and sugar treats and just stick with the things I know won't make me feel sick.  I'm always the happier for it when I feel well at the end of the day.

That being said, I still enjoy some indulgences and just have to make them " my style"!  I've got a few tricks up my sleeve this year and this Cranberry Sauce is one of them!  I made a turkey dinner last Sunday, I called it my Pre-Christmas Christmas Dinner and had my in-laws over to share this delicious meal.  So many components of a traditional turkey dinner are naturally gluten-free, the turkey, vegetables, gravy(thicken with something other than wheat flour) and cranberry sauce.  Now the stuffing, I haven't converted over to gluten-free yet.  I'm so attached to the good ol' family recipe.  It's one of the very few things that I will cook that's not gluten-free. 

Now let's talk about that cranberry sauce:  I love cranberry sauce.  The canned stuff, I'll eat it, but it's no match for the home-made cranberry sauce.  Since I started cooking Christmas dinner, I've always bought a bag of fresh cranberries and followed the instructions on the bag: one cup water and one cup sugar, add cranberries.  This year, I was thinking, there's no way that I can possibly make this recipe anymore!  It seems so wrong to add a cup of sugar when there are so many alternatives!  So this is my recipe for sugar-free cranberry sauce. I made it, we ALL loved it, and agreed that we would prefer to eat this over any other cranberry sauces we've had in the past as it is sweet but kept some of the tartness of the fruit, which is really lovely!

cranberry sauce

3 cups fresh cranberries (I would imagine that frozen cranberries, thawed, would yield the same result)
1/2 cup orange juice, freshly squeezed (appx 2 oranges)
1/2 cup water
1/2 cup agave syrup (or use raw honey)
  1. In a medium saucepan, bring water and orange juice to a boil. 
  2. Add cranberries and agave syrup.
  3. Bring up to boil again and stir occasionally for 5 minutes.
  4. Remove from heat and let sit to cool.
  5. Once cool, put in refrigerator.
  6. Take it out about an hour before serving to get it to room temperature.
Tips to a successful Christmas dinner:

I remember the first Christmas dinner I cooked for family.  I was in the kitchen all day, completely stressed out and didn't get to do any visiting.  I felt jipped!  Over the years, I've become much more organized and I keep it simple.  Here is some of the pre-work you can do the day before:
  1. Make cranberry sauce, put in fridge
  2. Peel and chop potatoes, put in pot of cold water, ready to cook, put in fridge
  3. Peel and chop carrots, put in pot of cold water, ready too cook, put in fridge
If your vegetables are organic, no need to peel them!  Except for potatoes if you want to make velvety mashed potatoes!

***HAPPY HOLIDAYS AND ENJOY YOUR TIME WITH FAMILY AND FRIENDS!***


Friday, November 23, 2012

Beef Tacos with Fried Plantains

Print Friendly and PDF


Beef Tacos - NOT from a box !
The first time I made my own plantain chips was in Nicaragua.  We were on vacation there for 2 months and invited our new neighbours to come over and watch the Superbowl.  Tony and Michele who are from Vancouver, go to their beautiful vacation home in San Juan del Sur for a few months every year.  They quickly became very dear friends of ours.  Well Tony and Michele, lucky duckies, are back there now and will be for a few months.  So this post is for you guys!  I'm sure you're having a blast in your backyard oasis, stargazing, hanging out at the beach and eating the awesome food!  We miss you!

In my previous life, tacos always started with the purchase of a box containing taco shells, salsa and spice mix for the beef.  There is definitely a fresher taco to be had than that!  Seriously, those boxes make life easier, yes, but only short term.  We are healthier and feel so much better when we take a bit more time to make our meals with whole, natural foods!

beef tacos

1 lb ground beef
1 medium onion
3 garlic cloves, minced
3 medium roma tomatoes, pureed in food processor with skin on
cumin, ground coriander, chili powder, salt and pepper

  1. In a medium frying pan on medium-high heat, cook ground beef until almost done.
  2. Add onion and garlic, cook until onion is soft.
  3. Add tomato puree and spices.
  4. Stir, cook, taste, adjust spices to your taste!
  5. Suggestions for toppings: lettuce, diced tomatoes, Guacamole, shredded cheese and salsa. 
Paleo, Candida and Wild Rose D-Tox: Serve on lettuce shell (no cheese!!)
Gluten-Free: Serve on corn tortillas

__________________________________________________________________________

plantain chips

green plantains
oil, for frying (I use grapeseed oil)
salt

  1. Peel plantains
  2. Slice thinly with a slicer.  (You can also slice them lengthwise)
  3. Heat pan to medium-high, put about 1/2 inches oil and fry in batches, making sure to separate the plantains before placing in the oil.
  4. Stir often, until just starting to turn golden brown.
  5. Put on paper towel to absorb excess oil and sprinkle with salt.
Note: Green plantains can be very tricky and difficult to peel.  My friend Jorlene in Nicaragua, showed me the way the locals do it, just follow these steps: http://latinfood.about.com/od/cookingbasicstips/ss/peelplantain.htm.  On TV, I've seen green plantains parboiled, with skin on, prior to peeling.  This made peeling much easier, but I've never tried it.  I'd rather save myself (or hubby) having to wash another pot!
           In Nicaragua, they serve plantain chips with a mayo/ketchup mixture.  Or have them plain and enjoy!


Tuesday, November 20, 2012

Carrot Soup

Print Friendly and PDF
Easy peasy carrot soup!


As with most weekend mornings, my sunday morning started with a power cook.  It's when I have the most energy to chop, cook and clean, many times over.  It's my favourite time in the kitchen, and afterwards, have prepared, healthy food for my family for at least a few days.

One of the recipes I made this morning was my Mom's carrot soup.  It's really easy and simple to make and the flavour of this soup is amazing.  It's not always easy to get my kids to have their quota of vegetables every day and this soup sure helps!

carrot soup

5 cups water
2 1/2 cups carrots, chopped
1/4 cup basmati rice (for paleo, simply omit the rice.  It will still be nice and creamy)
1 onion, chopped 
2 garlic cloves, chopped
3 tablespoons butter
salt and pepper to taste

  1. Put all ingredients in a large pot.
  2. Bring to a boil and simmer for 30 minutes.
  3. Let it cool for a bit, then blend in food processor, blender, or with handheld blender until smooth.
  4. Return to pot, add salt and pepper to taste.
  5. Heat and enjoy!  
Rice tips: There are many different kinds of cooking rices out there.  Make sure to use a rice that cooks in less than 30 minutes.  
                If I have cooked brown rice in the fridge, I use 3/4 cups of it instead of the basmati rice, resulting in an equally smooth textured soup.


Monday, October 8, 2012

Curry Peanut Soup

Print Friendly and PDF
Better-Than-Restaurant Soup!

I got a recipe for Curry Peanut Soup from my sister, which is a new favourite in their household.  An easy to make, delicious soup.  The first time I made it, I followed the recipe and had delicious soup for the week to bring to work.  This weekend, I made it again and decided to change it up a little bit.  Partly because I was missing some ingredients and I also wanted to add some heat to it.

When my man took his first bite, he melted a bit and said: "This soup is better than at the restaurant!" I can tell you that here in Calgary, Alberta, the days are getting increasingly colder.  We've already had a couple spells of snow, and this soup hits all the right buttons to make you feel warm and cozy.  It's easily adaptable to different diets and as usual, will make some suggestions at the bottom of this post.

Here's my take on this delicious, gluten-free soup!

curry peanut soup

2 tablespoons Bragg's Soy Seasoning (you can use soy sauce if not following specific diet)
1 onion, chopped
1 medium sweet potato, diced
1 large carrot, sliced
1 celery stalk, sliced
1 red bell pepper, diced
1 lb small shrimp, cleaned and deveined
5 medium roma tomatoes, chopped roughly and pureed in food processor with skin on
1 cup coconut milk
3 cups water
2 cups chickpeas, cooked (or 1 can chickpeas, drained and rinsed)
1/2 cup fresh cilantro, chopped
2 tablespoons green curry paste
2 tablespoons peanut butter 
1 tablespoon fish sauce


  1. Heat 1/2 cup water and soy seasoning in a large pot
  2. Add onion and sweet potatoes.  Cook for 5 minutes over high heat, stir occasionally.
  3. Add carrot, celery and pepper.  Cover and cook 3 minutes, stir occasionally.
  4. Add shrimp and tomato sauce and cook until white, about 5 minutes.
  5. Stir in coconut milk, water, chickpeas and cilantro
  6. In a small bowl, mix peanut butter with 1/3 cup water, fish sauce and curry paste with a fork.  Add to soup.
  7. Mix well, cover and simmer for 10 minutes.
Candida: replace raw shrimp with cooked chicken or meat of choice.  Find curry paste with only acceptable ingredients.  I found one in the ethnic section at Superstore with no added sugars.  Also use almond butter instead of peanut butter and omit fish sauce (you might need to add a little salt).

Paleo: Omit chickpeas and soy sauce (use oil for frying instead of water/soy sauce mix)

Vegetarian: use firm tofu instead of shrimp.

Candida: use almond butter instead of peanut butter

Note: this soup was ready from start to finish in 30 minutes.  If you have fresh tomatoes, don't skip this step, it's so worth it!  If you don't have fresh, use 15 oz can of crushed tomatoes.  But I tell you, the taste is so much better if you crush your own!

Monday, October 1, 2012

Pasta Sauce

Print Friendly and PDF
pasta sauce with ground bison on brown rice spaghetti


I can't believe how long it's been since I've posted a recipe!  Since school has started, I've been busier in the kitchen than ever, especially on the weekends doing "power cooks", but haven't had time to post anything!  Tonight, I'm making the time, even though I really should start transcribing my shorthand meeting minutes from the school council meeting from a week ago!   That'll just have to wait another day, or two...

The Farmers' Market right now is really in its prime time of year.  I absolutely LOVE the Farmers' Market.  I go to the Crossroads Market in Calgary and get all my meat, cheese (the best Ossau Iraty ever - it's a sheep cheese), and this time of year, tomatoes and peppers galore!  I've been making fresh salsas, pasta sauces and curries that are just to die for.  A 10 lbs box of tomatoes costs me $10 and a huge bag of assorted peppers, about the same.  For $20, I can make sauces that'll last much longer than any store-bought bottle.  And the taste doesn't even compare.

Here's a pasta sauce I made that we all really enjoyed.  I've used it with ground bison for spaghetti sauce, used it on its own with polenta, as pizza sauce as well as mixed with some Ossau Iraty to make mac and cheese for the kids.

pasta sauce
1 medium onion, chopped
4 garlic cloves, chopped
1 red pepper, chopped
1 green pepper, chopped
7 large heirloom tomatoes, skin removed, chopped
3 tablespoons fresh flat-leaf parsley, chopped
2 tablespoons fresh oregano, chopped

  1. Put all ingredients in a large saucepan.
  2. Bring to a boil, then simmer, covered for 1 hour.
  3. Uncover, and simmer for 30 minutes, stirring occasionally
  4. Remove from heat and cool
  5. Puree in food processor (don't do as I did, watch out for the liquid-fill line!
  6. Put in refrigerator or freeze in smaller portions.
Vegetarian: use sauce on its own without adding meat to it and serve with your favourite pasta, polenta, gnocchi, pizza, etc....
Paleo and Candida: use sauce with ground meat or sliced sausages on spaghetti squash 


Sunday, September 16, 2012

Egg Muffins

Print Friendly and PDF
 Breakfast of Champions - Egg Muffins served with Yams


We've all heard it before, breakfast is the most important meal of the day.  It's so true and can really set the pace for the rest of the day.   I find this meal is top notch for breakfast.  So full of nutrients when made with vegetables and served with yams, and can be eaten on almost any type of diet: candida, paleo, vegetarian, gluten-free, dairy-free, etc.

This is usually the first of many recipes I make on Saturday morning as part of getting some pre-made meals for the week.  I make these with a good batch of grated yams and we have breakfast for the week.  Each container gets a couple of big spoonfuls of yams and two egg muffins.

I love the versatility of this recipe.  I've made them with only bacon, which my kids absolutely loved, made them with veggies and sausage, and also as in this recipe, with veggies only.  Play around and use what you have in the fridge!  If you eat dairy, add some cheese in there!  And these also freeze very well.

egg muffins
1 tablespoon coconut oil (or oil of choice)
1 onion, chopped
1 red pepper, chopped
1 green pepper, chopped 
1 jalapeño pepper, chopped 
1 cup mushrooms, chopped (not for candida diet)
2 tablespoons fresh basil, chopped
12 large eggs
Salt and pepper to taste

  1. Preheat oven to 350 degrees.
  2. Heat oil in frying pan on medium heat.
  3. Cook onions for 5 minutes.
  4. Add peppers and mushrooms.  I like to cook these until they start to caramelize, about 10 minutes.
  5. Remove from heat.
  6. Add 2 basil and let cool.
  7. In large bowl, beat 12 eggs.
  8. Add cooled veggies to eggs, add salt and pepper and mix well.
  9. Fill greased muffin tins to almost full and bake for 15-20 minutes, until edges are golden brown.
  10. Let stand in muffin tin for at least 5 minutes before removing to serve.
          Makes 15 egg muffins

          Note: For the grated yams, I simply wash a few yams, grate them and fry in coconut oil.  I leave           the peel on for extra flavour and nutrients.  


Monday, September 10, 2012

Nut Butter

Print Friendly and PDF
Homemade almond/pecan butter for dipping with my favourites: celery and apple
So the other day, I came across a recipe on how to make nut butter.  The instructions simply said put nuts in the food processor, turn food processor on, leave for 10 minutes, come back and it's done.  I had my doubts but decided to give it a go.  First, I used my roasted nuts, which are so completely packed with flavour!  I followed the instructions and abracadabra, had the best tasting almond butter I've EVER had!

Feel free to use any nut, raw or roasted, and try any combination of your favourites.

Candida Diet: serving suggestion - spread nut butter on a brown rice cake and top with fresh berries (if allowed small amounts of low-sugar fruit)

Paleo Diet: I have recently started following the Paleo diet and love this snack with the almond/pecan butter used as a dip for celery and apple slices.  The roasted pecans add even more sweetness to the butter....yummm!


almond/pecan butter

roasted almonds 

  1. Place almonds in a single layer on cookie sheet.
  2. Roast in oven at 350 degrees for 15 minutes.
  3. Remove from oven and pour into a plate to cool

roasted pecans
  1. Place pecans in a single layer on cookie sheet.
  2. Roast in oven at 350 degrees for 13 minutes. (yes, 2 minutes less than the almonds)
  3. Remove from oven and pour into a plate to cool
Once the nuts are cooled, put in the food processor (I used 2 cups of each) and leave for 10 minutes.  Pour into container or jar and refrigerate.  I've always hated having to mix in the hard almond paste from the bottom of the jar with the top layer of oil, when it comes to store-bought almond butter.  I find it messy, and depending on the brand, almost impossible.  I'll never have to do it again!  

If anyone comes up with some really tasty combinations, please leave a comment.  I'm sure hazelnuts would be heavenly!


Thursday, September 6, 2012

Fish Tacos

Print Friendly and PDF


Beautiful fish tacos, thanks Mathieu!

Mathieu's biggest catch yet!


Our last outing of the summer and we decided to go fishing for two days.  We went to Cow Lake, near Rocky Mountain House, Alberta with Grandpa and his boat.  Isn't that exactly what kids' memories are made of?  We spent many hours on the water, fishing, snacking or just taking in the warm sunny breaks and talking about things.  After our first day, grandpa had caught the only "keeper", an 11 lbs northern pike!  We went to my husband's cousin's house who has a beautiful family with two children, aged 8 and 5.  Perfect for our 7 and 4 year olds!  The kids had fun playing while grandpa put together his famous fish fry.  I wish I had a picture of that!  We had some catch-of-the-day with french fries, a perfect meal after a hard day of fishing.

Day # 2, Mathieu, our 7 year old son caught his first northern pike!  He was very apprehensive about bringing that 7 lbs fish in, but he did it and was very proud of himself afterwards, as were we.  And to top off his achievement, we made some delicious fish tacos with the 2 lbs of meat we got from it!  I swear he walked in to his first day of school the next day just a little taller! :)

fish tacos
2 lbs northern pike (or type of white fish i.e. walleye, tilapia, sole)
2 tablespoons oil
1 medium red onion, chopped
7 garlic cloves, minced
1-2 jalapeños, seeds included (I used 1 so it wouldn't be too hot for the kids but prefer it with 2)
2 cups tomatoes, chopped
1/2 cup cilantro, chopped 
6 tablespoons fresh lime juice
Salt and pepper to taste
1-2 avocados, sliced (or if already made, use homemade guacamole)


  1. Heat oil in large frying pan to medium-high
  2. Cook onions and garlic until soft, about 5 minutes.
  3. Add fish, cook for about 4 minutes on first side.  Then turn and cook until it flakes easily, another couple minutes.
  4. Flake the fish and add the jalapeños, tomatoes, cilantro, lime juice and salt and pepper.  
  5. Cook for another 5-10 minutes.
  6. Serve on lettuce leaf or tortilla of your choice (or lettuce leaves for paleo diet)
  7. Thank son for a great catch!
      Serves 4-8 (depends if serving with lettuce or tortillas:  I had mine with lettuce and ate more of the          
      fish mixture than my husband who had his with corn tortillas.)


Wednesday, September 5, 2012

Guacamole

Print Friendly and PDF
The possibilities are endless with this yummy guacamole!


It's been a busy time enjoying the last long weekend of the summer and having my son go back to school this year.  He's returning to school after a 1 year travelling hiatus and going to French immersion for the first time!  It's back to making lunches, checking backpacks, homework, early bedtimes, early wake-ups, basically mega-organizing for parents again once again.

Times like this make me go back to the basics and this guacamole recipe is one of them.   This famous Mexican recipe can be used as a dip for corn chips, rice cakes and vegetables and can also be used as a condiment for quesadillas, tacos, fajitas, burgers, hot dogs, wraps, sandwiches and whatever else you can think up!  So make a big batch, put it in the fridge, and it'll be gone before you know it!

We've all heard that avocados have healthy fats.  That means that they have a high mono and polyunsaturated fat content.  The more of this type of fat we eat, the less we crave the unhealthy fats.  And that's not even counting the 20 or so vitamins and minerals this wonderful fruit has to offer!

guacamole
4 large avocados
1/2 medium red onion, chopped
2 tablespoons chopped cilantro
juice of 1/2 lime
1 teaspoon cumin
1/2 teaspoon salt
1/4 teaspoon pepper
2 tomatoes, diced


  1. Put avocados in food processor and mix until velvety smooth.
  2. Add the onion, cilantro, and lime juice to the food processor and mix some more until well blended.
  3.  Spoon mixture in a small bowl and add the cumin, salt, pepper and tomatoes.
  4. Mix with a spoon until everything is mixed.
  5. Store in refrigerator.
     Makes 2 cups

Note: If you're not a fan of cumin, just leave it out.  Sometimes I make it without the cumin for a different flavour.  I've also added one chopped jalapeno (with seeds) to the food processor mix for a spicy and delicious result!